The traditional approach to mock exams treats them like a final judgment. You sit a pre-made exam, get a score, and that number is supposed to tell you whether you're ready. It conditions you to believe a single score on a single mock defines whether you'll pass or fail.
It doesn't. A mock exam is a diagnostic tool. It reveals what you don't know so you can go learn it. Treating it as a verdict is like treating a blood test as a sentence — the whole point is to catch the problem early enough to fix it.
QuizOdontist doesn't sell mock exams. You build them yourself. You choose the subjects. You control the weightage. You set the difficulty. You decide how many questions. And you can retake them as many times as you need — every attempt tracked, every attempt teaching you something new.
This is the Custom Mock Builder.
Where to Find It
Open Subject Mocks from the sidebar. At the top of the Practice Hub, two tabs: Subject-wise Mocks and My Custom Mocks. Click My Custom Mocks.
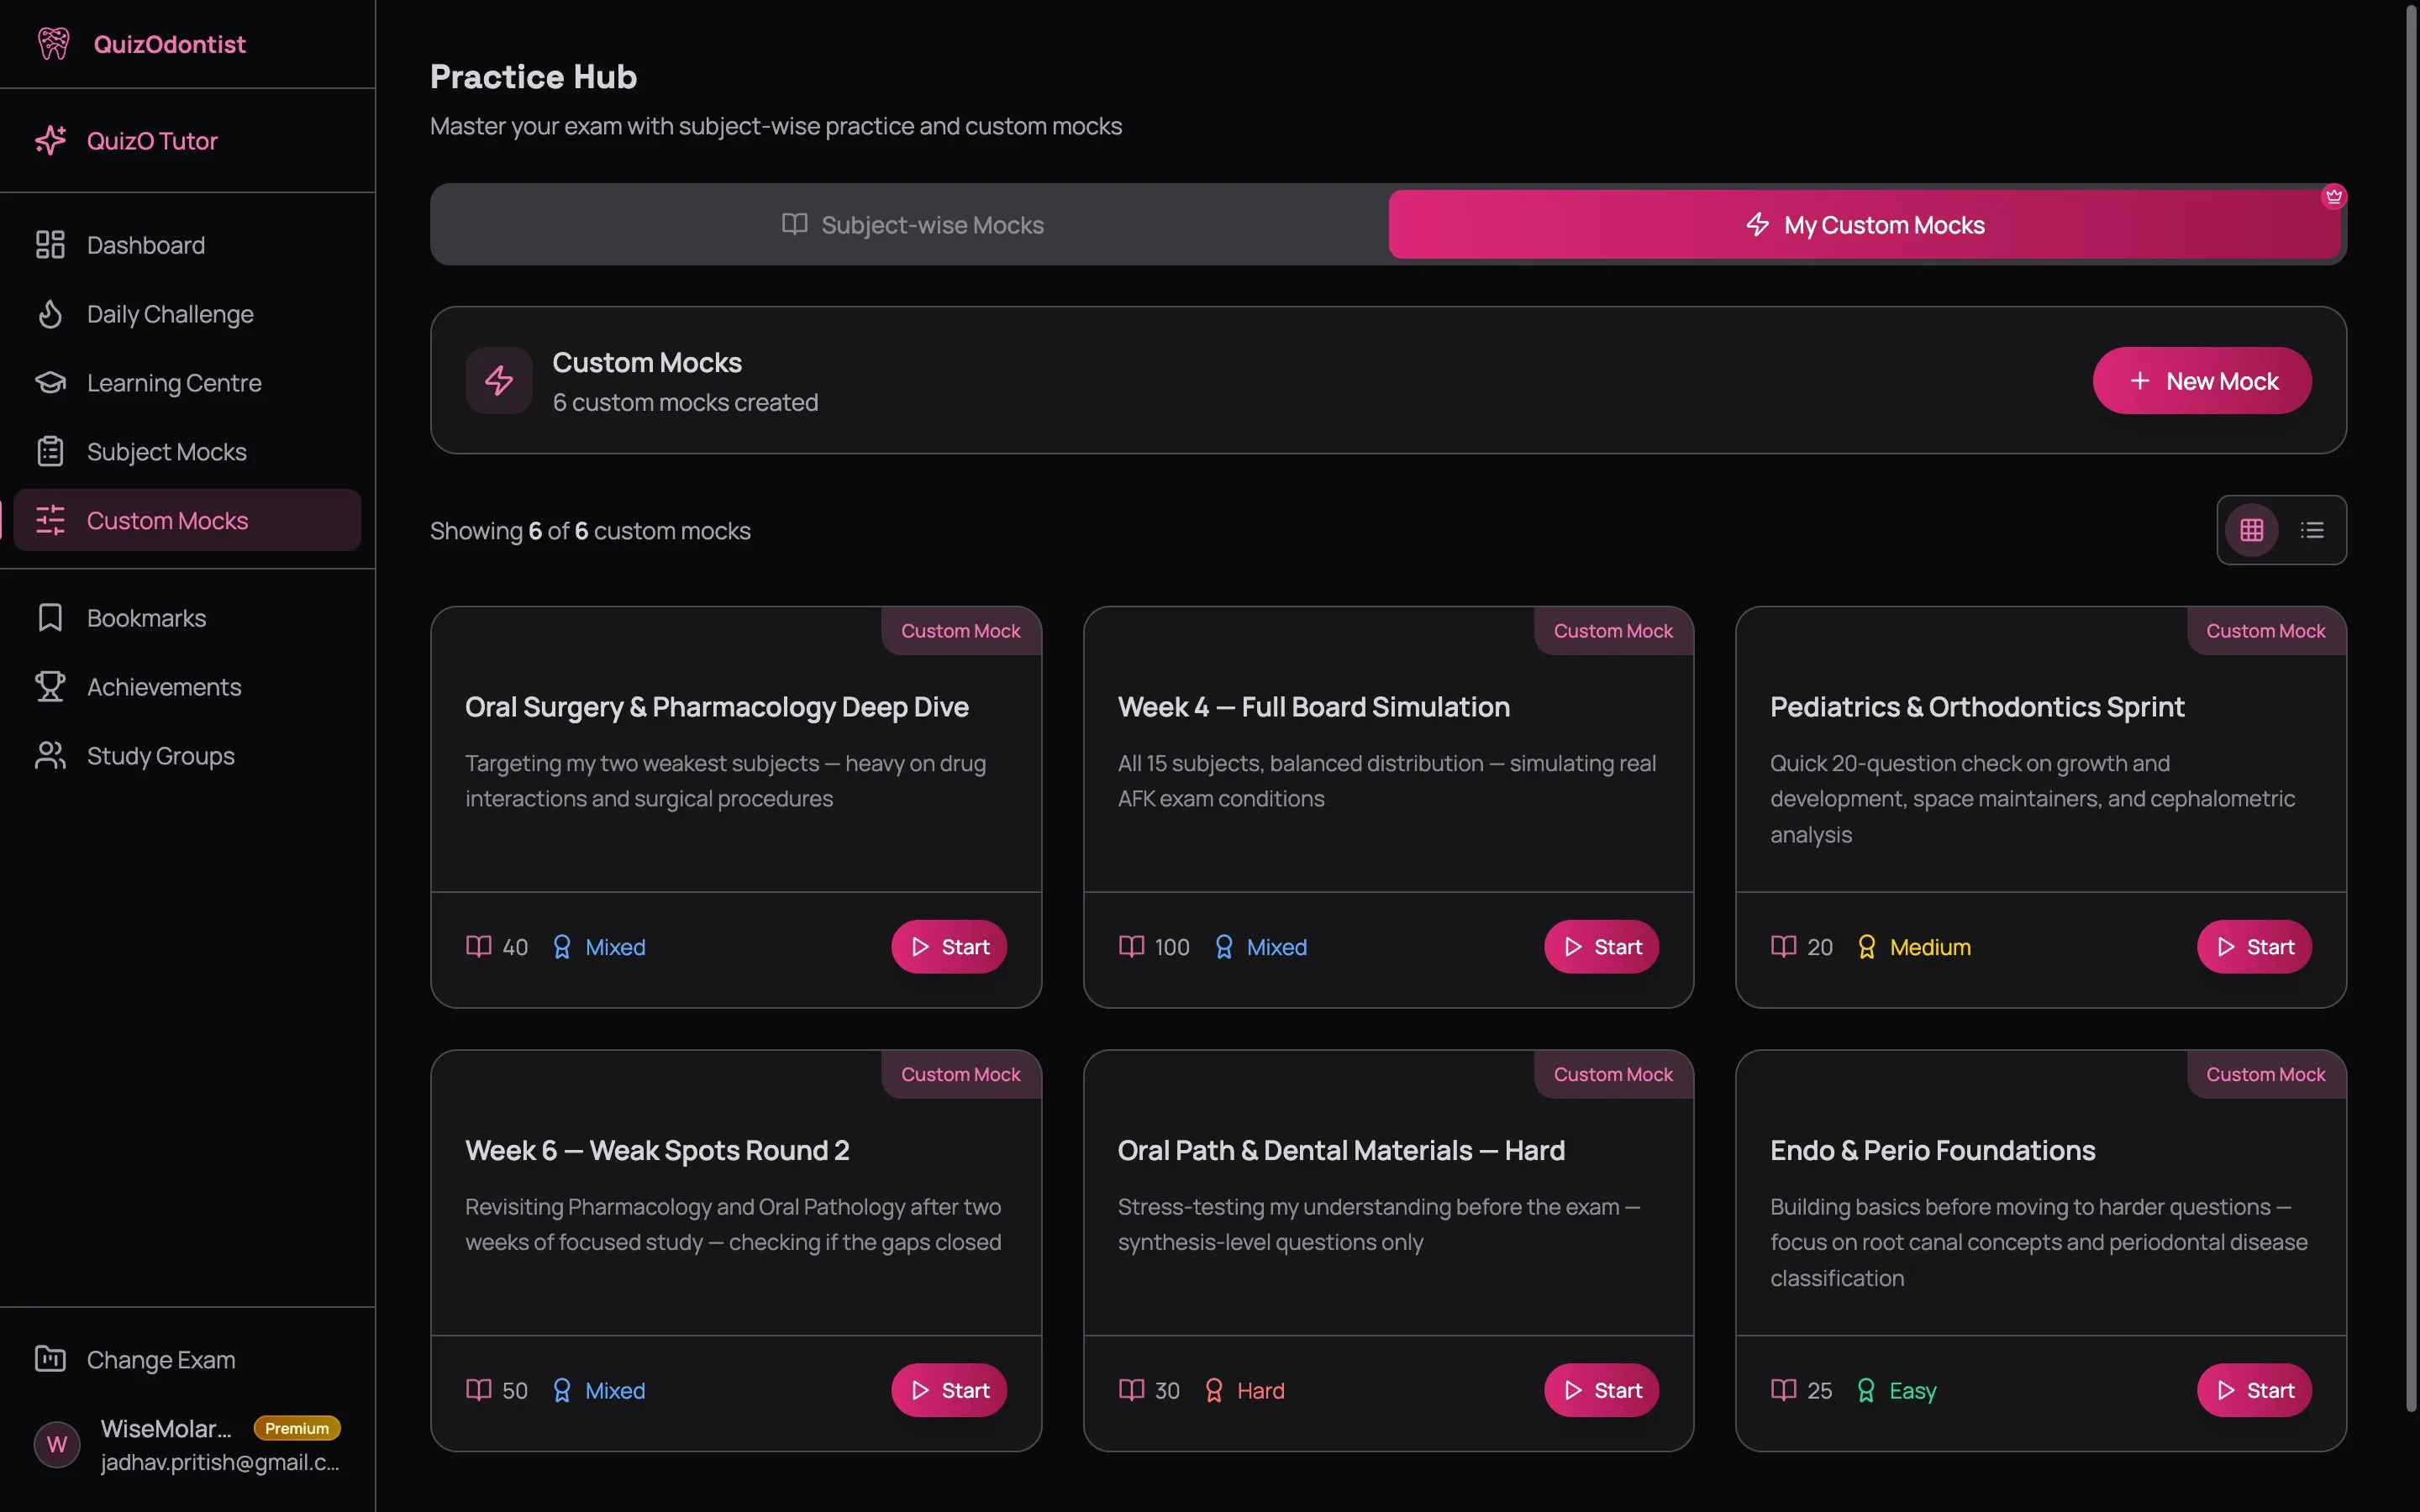
If you haven't created any mocks yet, you'll see an empty state with a single button: Create Your First Mock. If you already have mocks, they appear as cards — same format as Subject Mocks, but these are yours. Each card shows the mock name, description, question count, difficulty, and a Start button.
Click New Mock (or Create Your First Mock) to open the builder.
Step 1: Basic Information
The builder opens with two sections. The top section — Basic Information — asks for four things.
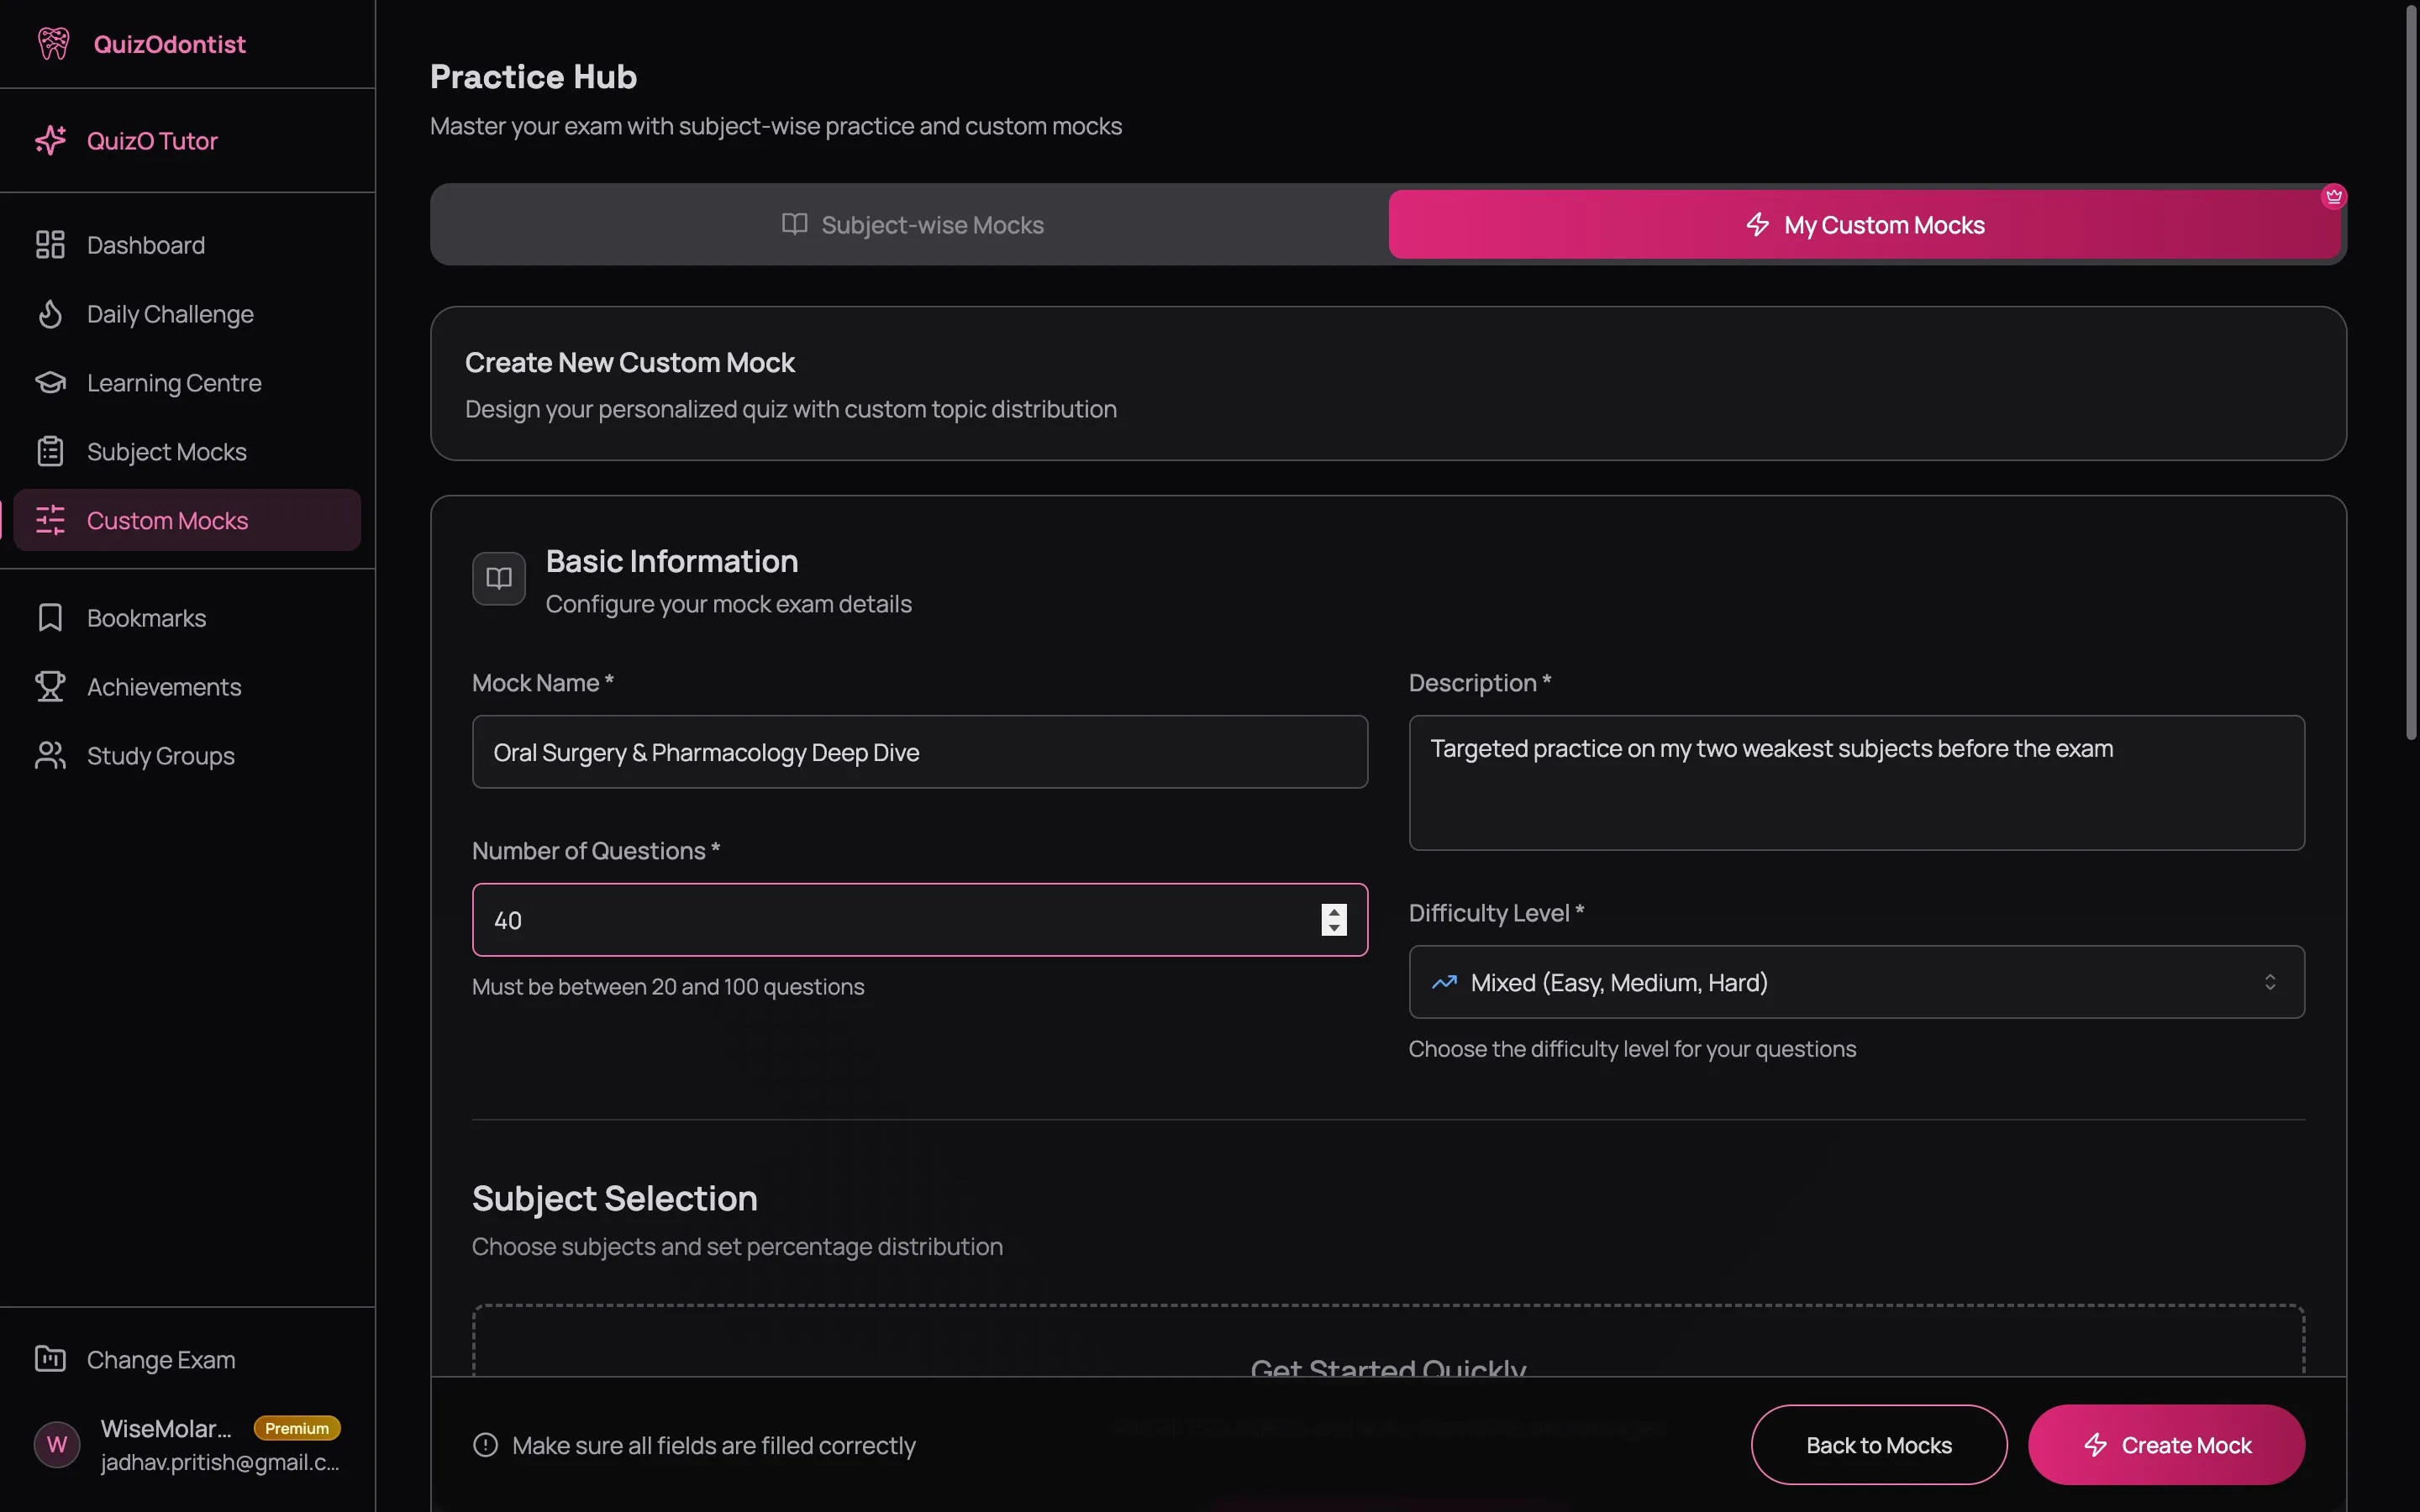
- Mock Name — call it something meaningful. "Oral Surgery & Pharmacology Deep Dive" tells you exactly what this mock targets when you see it in your history three weeks from now. "Test 1" does not.
- Number of Questions — anywhere from 20 to 100. More on choosing the right number below.
- Description — a short note for your future self. What's this mock for? Which weak spots is it targeting? You'll thank yourself when you're looking at a list of ten custom mocks trying to remember which one focused on drug interactions.
- Difficulty Level — four options:
- Mixed (default) — pulls Easy, Medium, and Hard questions. Best for general practice.
- Easy — foundational recall. Use this when you're early in a subject and need to confirm the basics.
- Medium — application questions. You need to connect concepts, not just remember them.
- Hard — synthesis and clinical reasoning. Two or three concepts interacting in a single question. Use this when you're close to exam-ready and want to pressure-test.
Unless you have a specific reason to isolate a difficulty level, Mixed gives you the most realistic practice. The AFK, INBDE, and ADAT all blend difficulty levels within a single exam — you won't know whether the next question is Easy or Hard until you read it. Training on Mixed builds that adaptability.
Step 2: Choosing Your Subjects
Below the basic info, the Subject Selection section shows every subject available for your exam. For the AFK, that's 15 subjects. For the INBDE, 11. For the ADAT, 15. Each one appears as a clickable button.
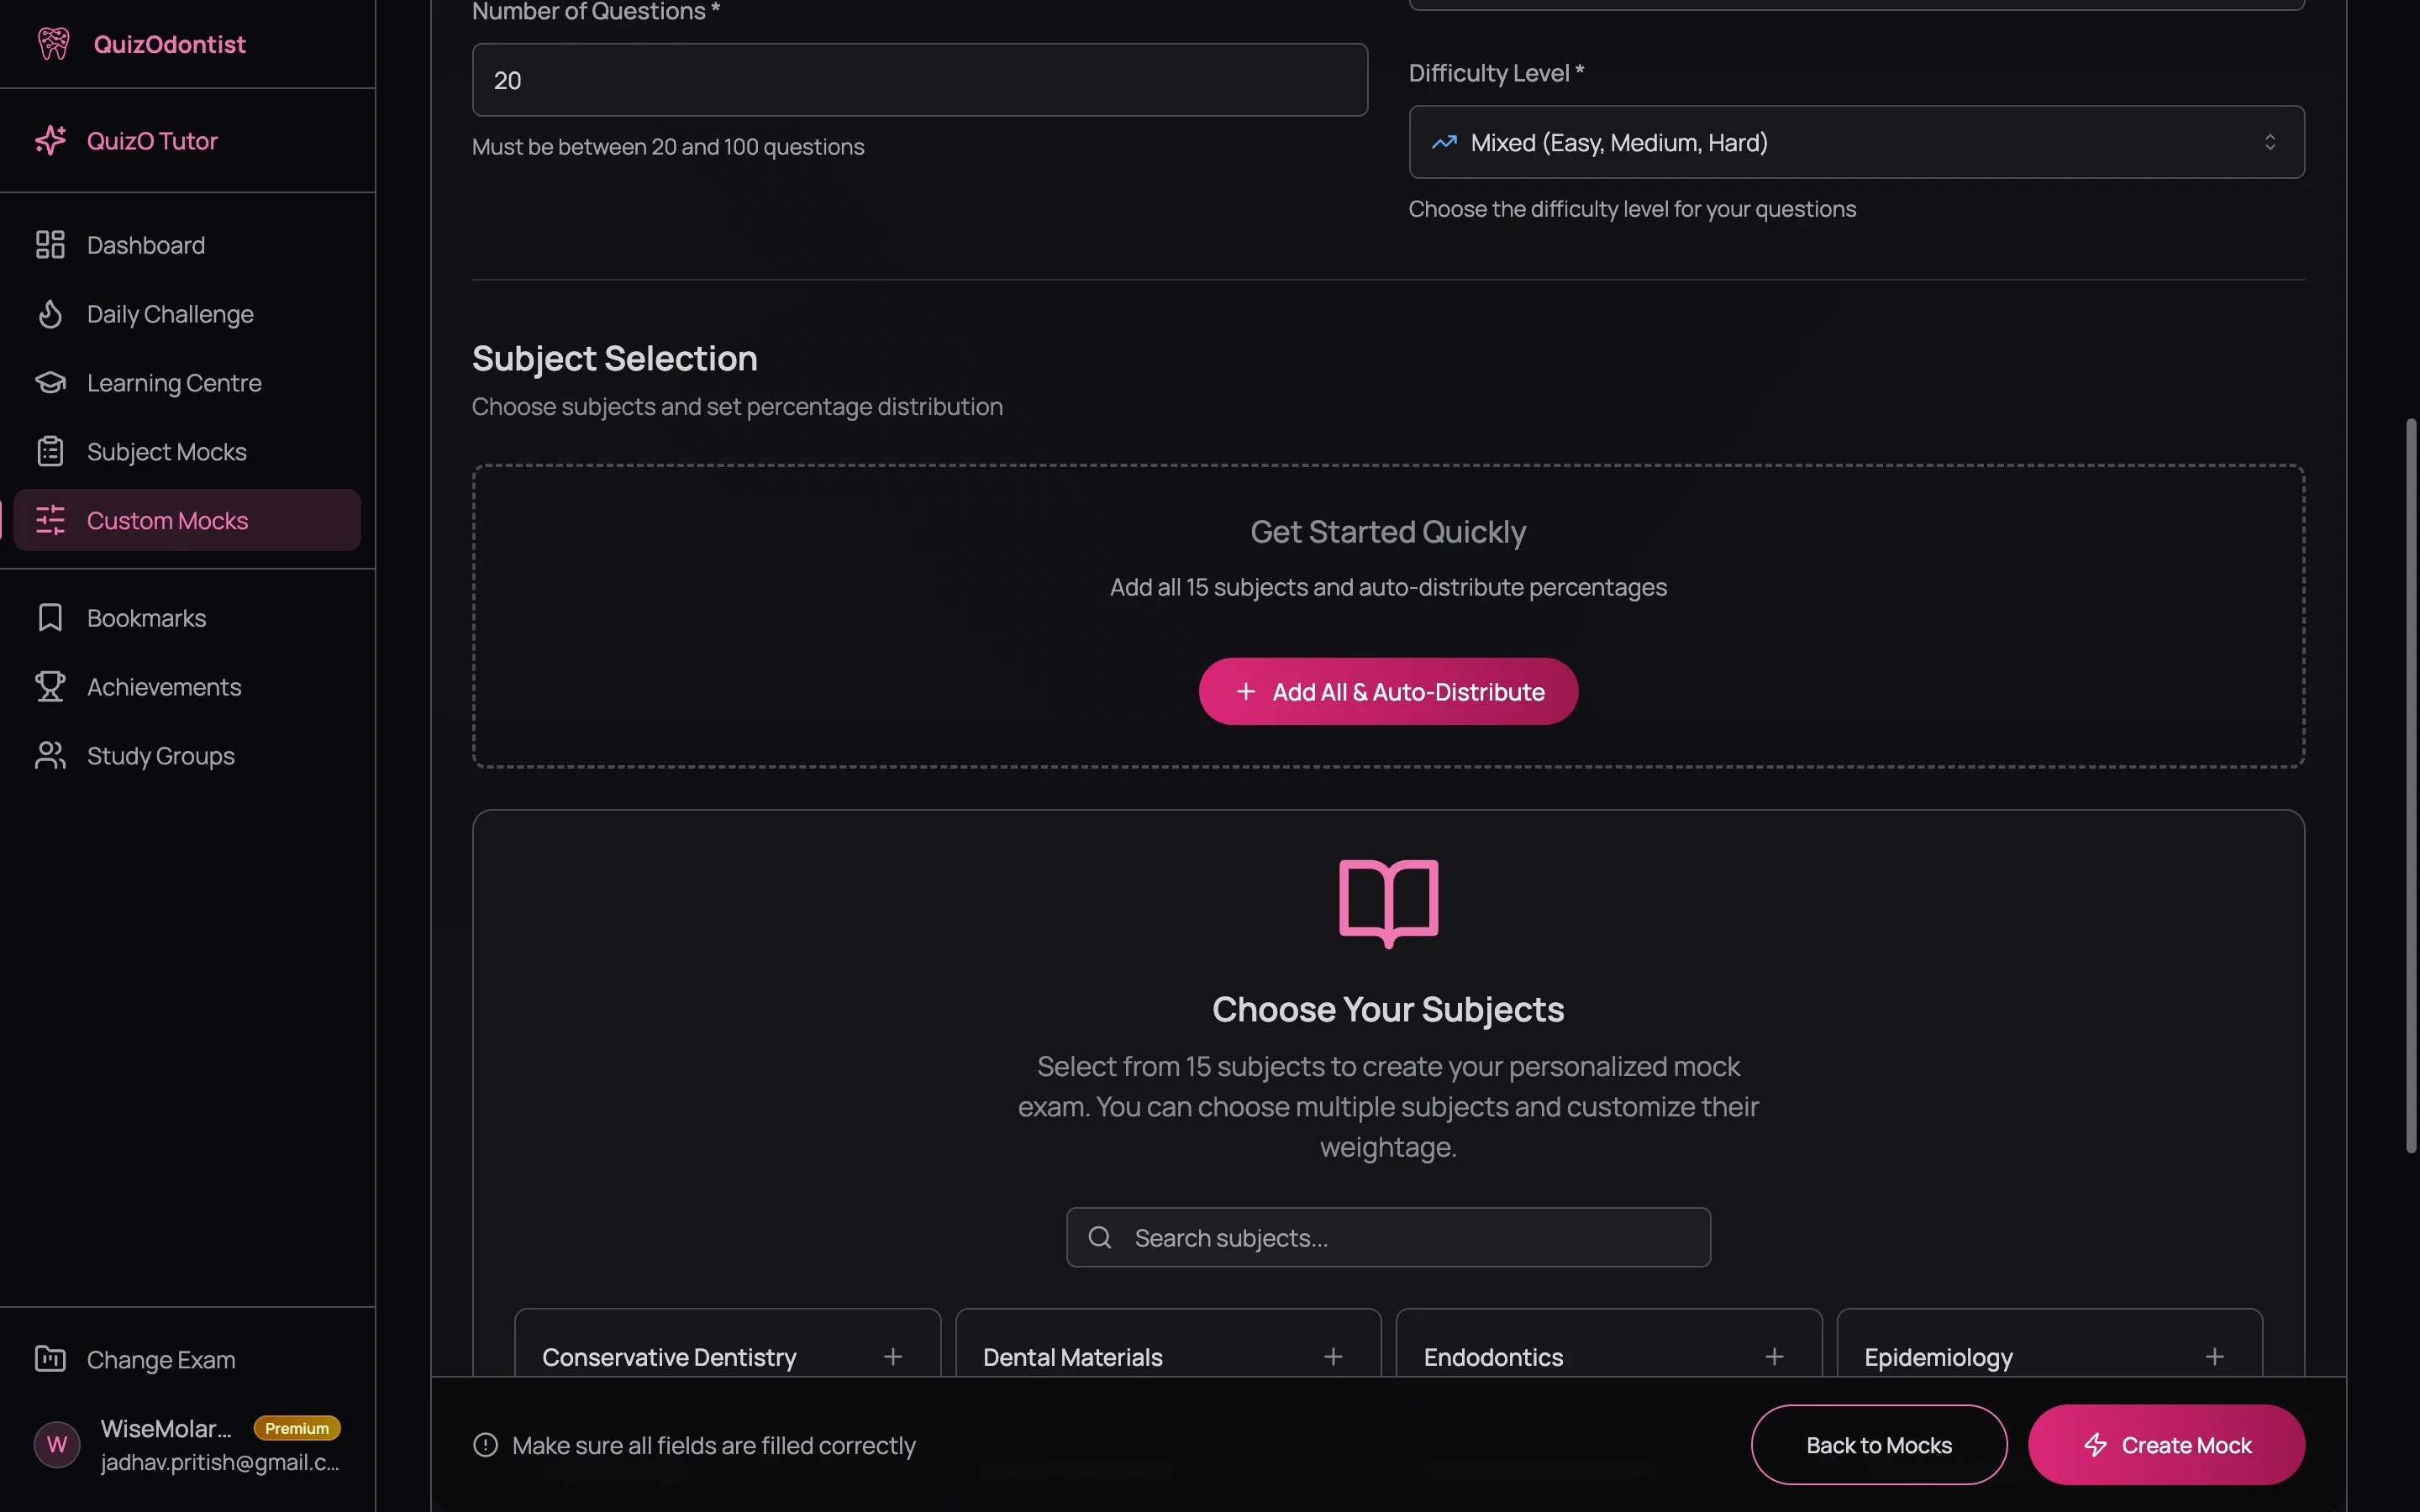
Click a subject to add it. Click another. Click five more. There's no limit on the number of subjects you can include — build a focused two-subject drill or a broad fifteen-subject simulation. Your call.
Two shortcuts save time:
- Add All & Auto-Distribute — adds every subject and splits the percentage evenly across all of them. One click and you have a balanced full-exam simulation.
- Add All — once you've added at least one subject, click Add More Subjects to reopen the subject picker. The Add All button inside that picker adds every remaining subject without changing existing distributions.
Step 3: Setting the Distribution
After selecting your subjects, each one appears as a card with percentage controls. This is where you stop building a quiz and start building a strategy.
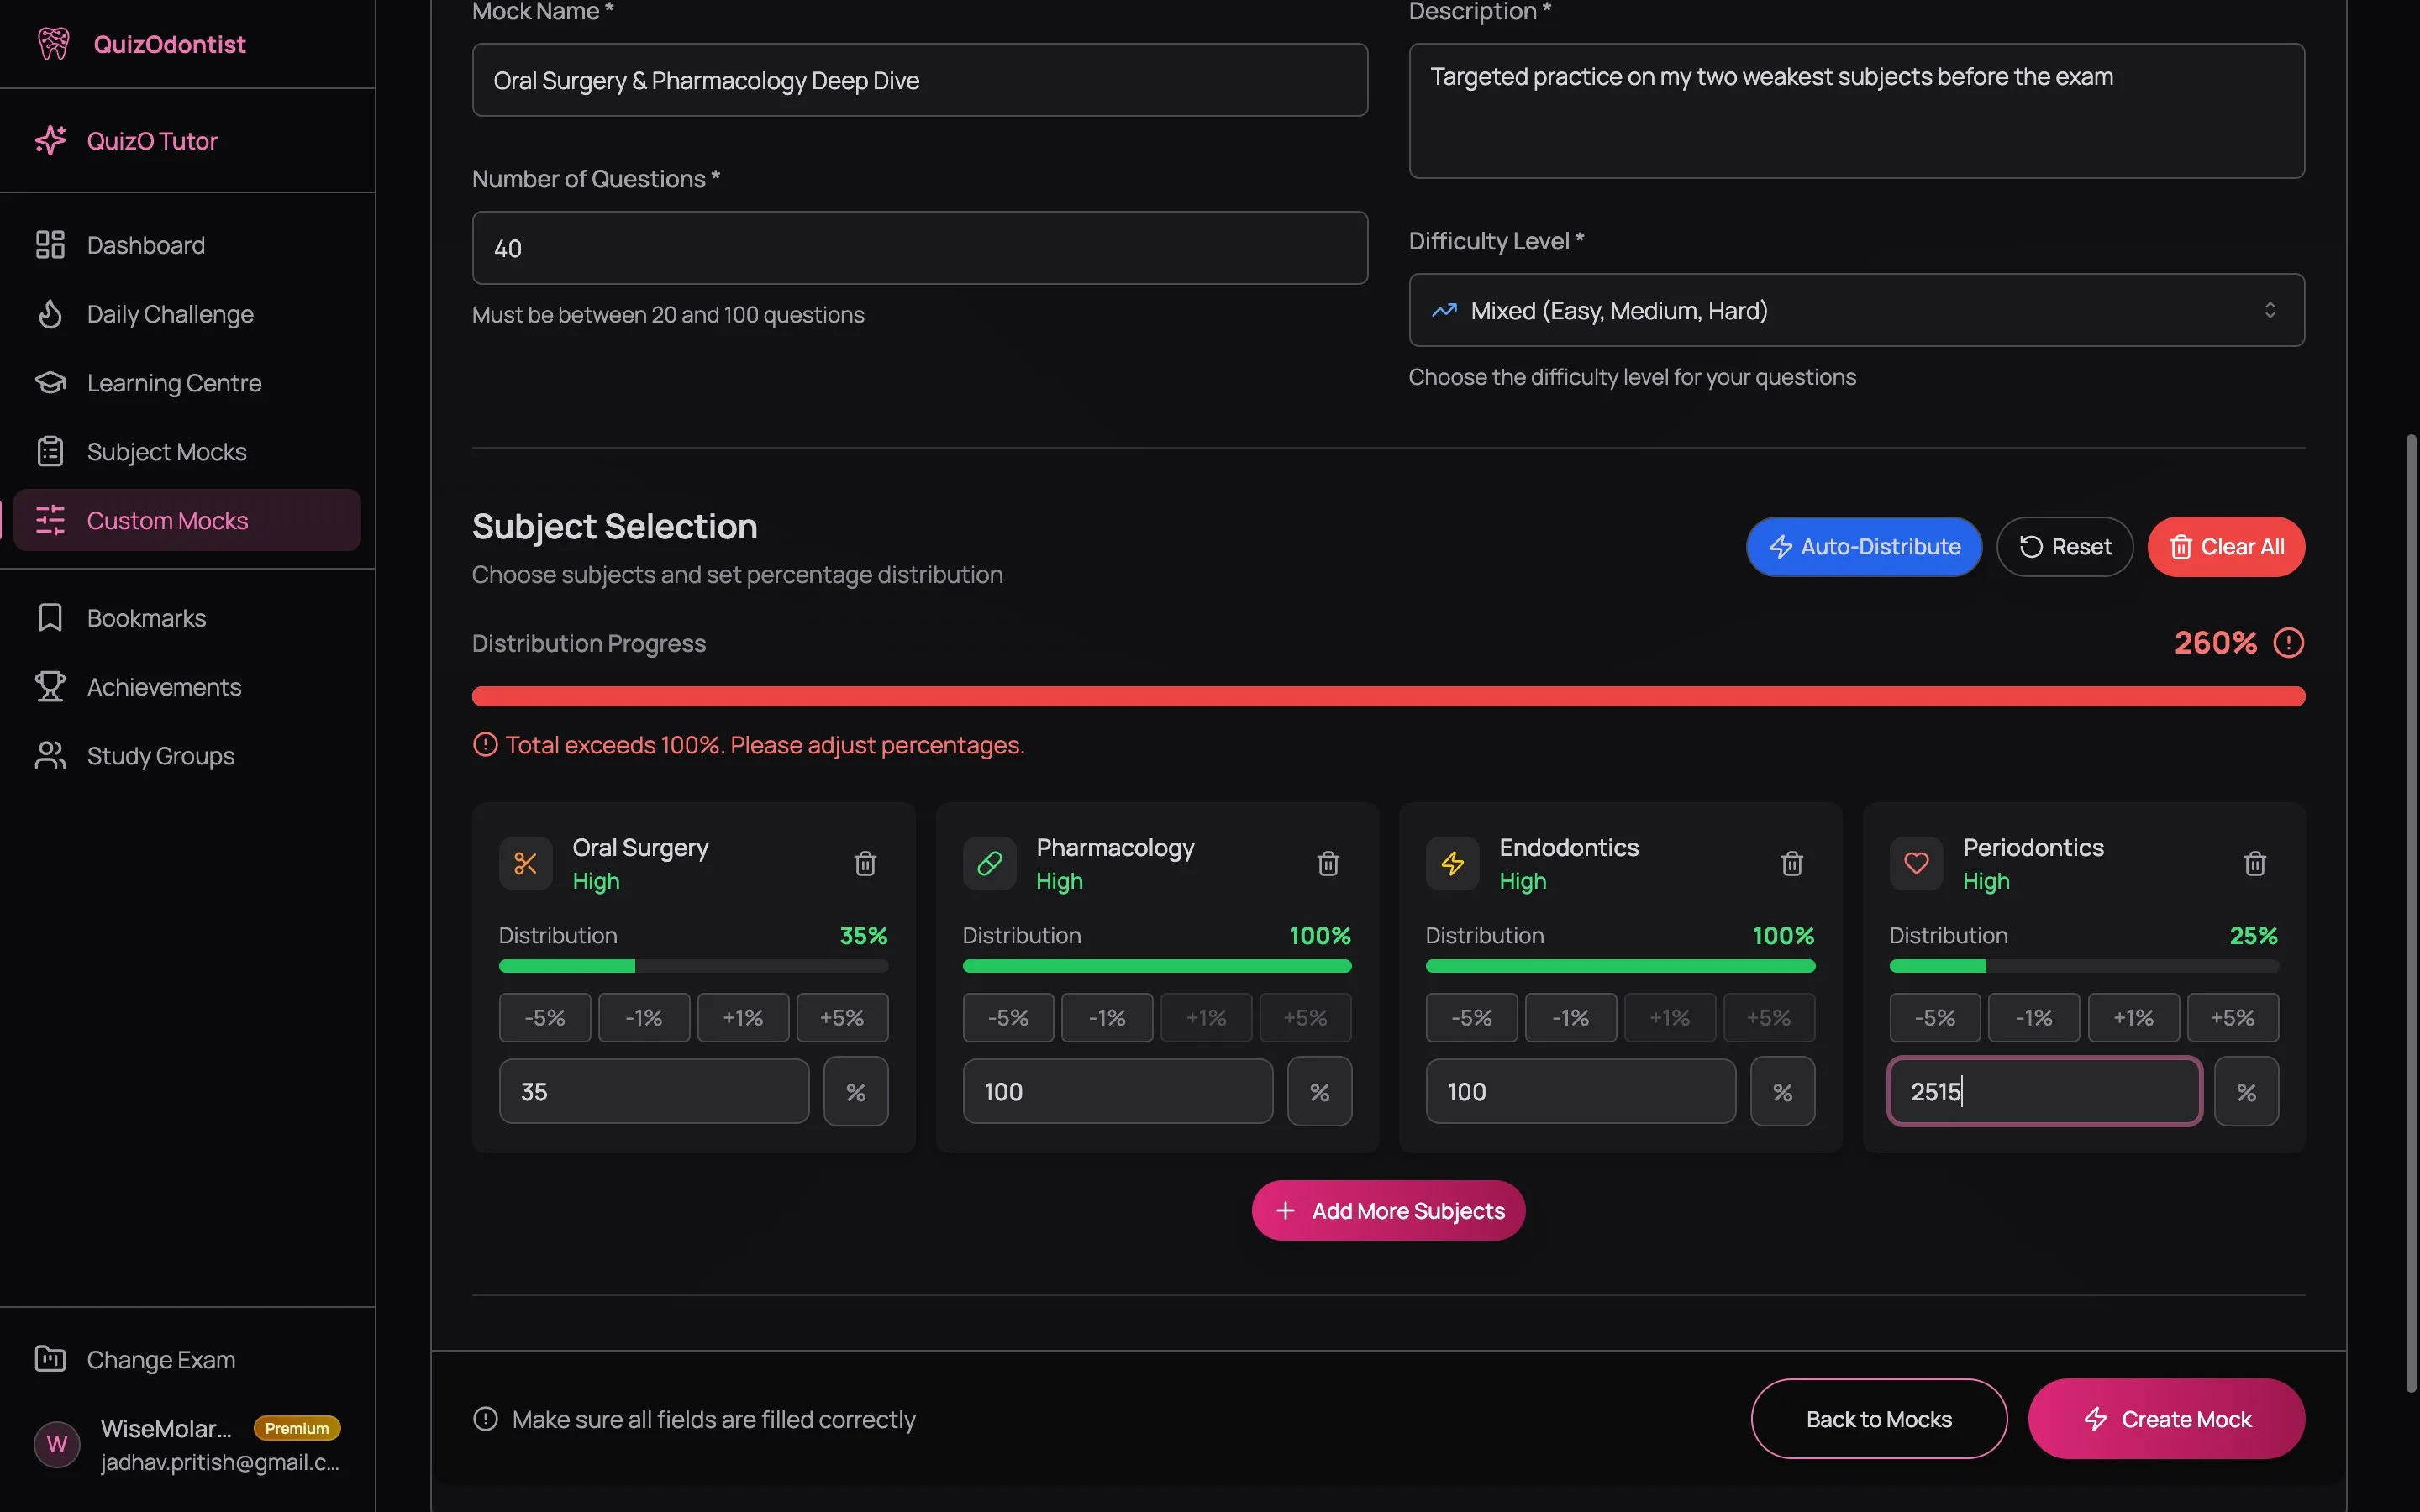
Each card shows:
- Subject name with a color-coded icon
- Percentage level indicator — Not set, Low, Medium, or High, so you can see the weighting at a glance
- Percentage bar — visual representation of the distribution
- Quick adjustment buttons — -5%, -1%, +1%, +5% for rapid fine-tuning
- Direct input field — type an exact percentage when the buttons aren't precise enough
- Delete button — remove a subject entirely
Above the cards, the Distribution Progress bar shows your running total. It must hit exactly 100% before you can create the mock. The bar is color-coded:
- Green — "Perfect! All percentages distributed." You're good to go.
- Yellow — "X% remaining to distribute." Keep adjusting.
- Red — "Total exceeds 100%." Dial something back.
Three bulk actions sit above the cards:
- Auto-Distribute — splits the total evenly. Four subjects? 25% each. Six subjects? ~17% each. Good starting point before you fine-tune.
- Reset — sets every subject back to 0%. Start over without removing subjects.
- Clear All — removes every selected subject. Nuclear option.
Don't just auto-distribute and call it done. If your dashboard shows Oral Pathology at 50% and Prosthodontics at 85%, giving them equal weight wastes half your Prosthodontics questions on material you already know. Weight your weak subjects heavier — that's what custom mocks are for.
How to Think About Distribution
The percentage controls how many questions from each subject appear in your mock. If you have 40 questions and set Pharmacology to 35%, you'll get roughly 14 Pharmacology questions. Here's a framework:
- Weak subjects (below 65% on dashboard): 25–40% each. These are your highest-value reps.
- Medium subjects (65–80%): 10–20% each. Maintenance reps — keep the concepts fresh without over-investing.
- Strong subjects (above 80%): 5–10% each, or skip entirely. You're already there. Don't over-invest in subjects you've already mastered while your weak subjects are where the points are.
Not sure which subjects are weak? That's what the Subject Analytics tab on your dashboard is for. Let data drive the distribution, not gut feel.
Step 4: Create and Start
Once your distribution hits 100% and all fields are filled, the Create Mock button at the bottom activates. Until then, it stays disabled — the builder won't let you create a mock with an incomplete distribution or missing fields. When everything's ready, click it.
A loading screen appears while the platform generates your personalized quiz — pulling questions from the subjects you selected, at the percentages you set, at the difficulty you chose. This takes a few seconds. Then you're redirected to your custom mocks list, where your new mock sits ready to start.
Click Start and you're in the same quiz interface as any other practice quiz — timer, flagging, question grid, the works. No difference in the experience. The only difference is that you designed the exam.
How Many Questions?
The builder lets you pick anywhere from 20 to 100. Here's how to think about it:
- 20 questions — quick diagnostic. Useful when you want a fast pulse check on one or two subjects. Takes about 15–20 minutes.
- 40–50 questions — the sweet spot for focused practice. Long enough to get meaningful data, short enough to sustain focus. Takes 30–45 minutes.
- 75–100 questions — full exam simulation. Use this when you're in the final weeks of prep and want to practice endurance. The AFK is 200 questions. The INBDE is 300+ across two days. Stamina matters — and one of the best ways to build it is to practice at length.
Custom mock results show up on your dashboard just like Subject Mock results. Your score trend, subject accuracy, and difficulty breakdown all update. A custom mock isn't a side project — it's a core part of your data-driven prep.
Managing Your Mocks
Every custom mock you create lives in the My Custom Mocks tab permanently. No expiration. No limits on how many you can build.
Each mock card shows:
- The name and description you gave it
- Question count
- Difficulty level
- Start button — one click to take (or retake) the mock
Your results are available in the History table on your dashboard, same as any other quiz. View the full breakdown, re-read all four explanations per question, and save questions that tripped you up.
There's no cap on reattempts. Take the same custom mock five times — each attempt updates your analytics and gives you a fresh look at the results page. A score that jumps from 55% to 80% over three attempts is real progress. But make sure that improvement transfers to other quizzes in those subjects — if only your custom mock score is climbing, you might be recognizing questions instead of learning concepts.
Four mock archetypes for different stages of prep, weekly cycles, and the review habits that turn a mock score into actual learning — read Custom Mocks That Actually Close Gaps.
Next Up
You've built a custom mock. You've taken it. Now what? Your dashboard pulls every quiz you've ever taken — custom or pre-made — into a single analytics view. Score trends, subject breakdowns, difficulty analysis, quiz history. Learn how to read it all in Reading Your Dashboard.
Want to keep momentum between study sessions? The Daily Challenge drops one question a day — enough to maintain your streak and stay sharp without committing to a full session.